I decided to replace it with a better quality "globe" valve to give finer control, and to move the valve to the driver's end of the engine. I also wanted to add a displacement lubricator to ensure the cylinder is always well oiled.
As Wilesco is a German company their models use metric threads throughout, whereas British steam models still use imperial sizes. I prefer to work in metric so bought all the metric fittings I needed from a German supplier Modellbau-Niggel. I was at least able to buy metric pipe from a British supplier, Macc Models.
Connecting the steam valve to the boiler
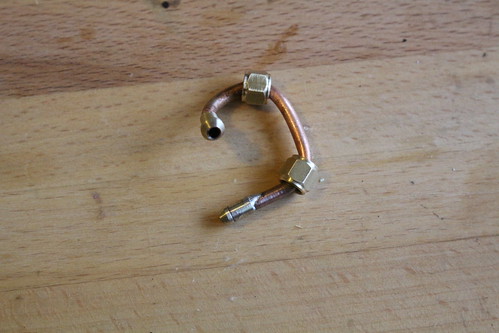
Rather than run a pipe from the original steam valve position to the driver's end of the engine I decided to move the whistle to the original valve position and connect the new valve to where the whistle had been. This would require quite a complicated bit of pipe bending with three 90° bends in close proximity.
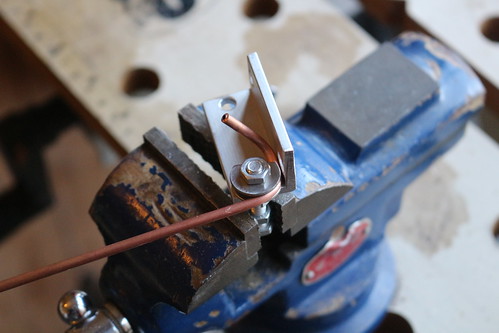
I made a simple pipe bending jig out of washers, nuts and a bolt. Cutting away the side of one of the washers allows bends to be made in close proximity, as well as making it easier to remove the bent pipe from the jig.
After bending the pipe and cutting it to length I soldered pipe nipples (or cones) to each end. As you can see, I used a bit too much solder on one of them.
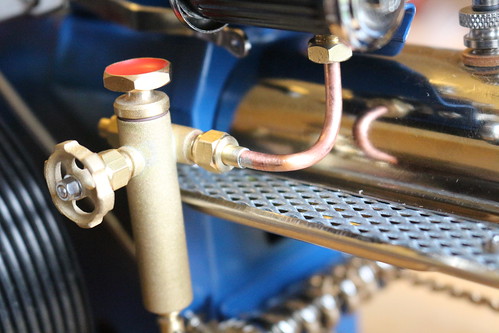
The completed globe valve connection.
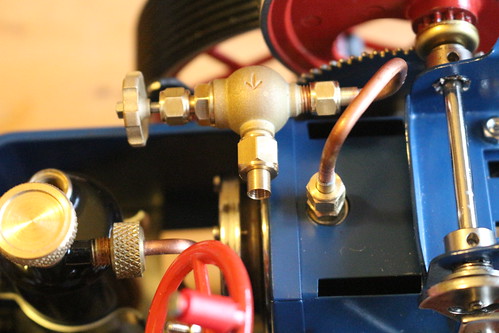
If you've browsed the Modellbau-Niggel web site you may have noticed that they don't sell a globe valve (or oiler) with 3mm pipe connections. I used their part number 310 425 which has an M6x0.75 threaded inlet and a 4mm pipe nipple outlet. I shortened the threaded inlet and then used a centre drill to make a seat for a 3mm pipe cone. I used a sleeve of 4mm brass tube to solder the outlet nipple to 3mm pipe.
Connecting the lubricator to the steam chest
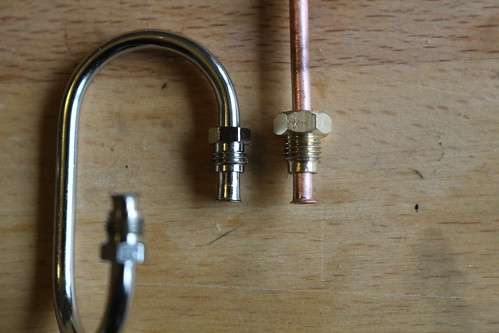
The traction engine's "steam chest" uses a flared pipe connection with an M6x0.75 nut (or screw, as it has male threads) to clamp the flared pipe to a sealing washer. The pipe is about 3.7mm diameter, so I couldn't simply reuse the nut with my 3mm pipe.
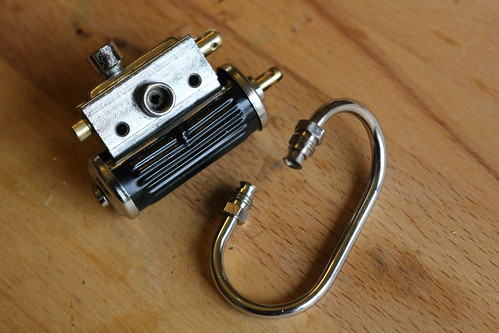
Instead I used part number 706 675 which is a good fit on 3mm pipe. I cut off one side and shortened the other, then filed off the thread at the very end so it fits the steam chest. Then I flared the end of some 3mm pipe.
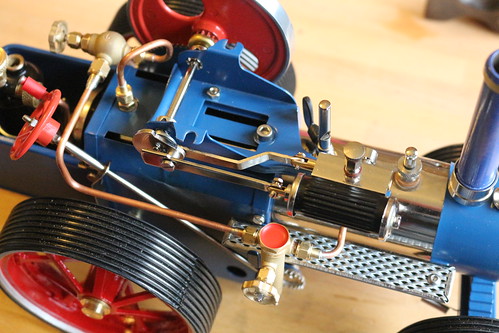
After bending the pipe and soldering a 3mm nipple to the other end the oiler was fitted to the traction engine.
As with the steam valve, the oiler I used (part number 400 104) has M6x0.75 threaded connections on which I used a centre drill to make seats for 3mm pipe nipples.
The final connection
The last bit of pipework is much simpler, apart from sleeving one end to fit the 4mm outlet of the steam valve.
Initial tests show everything is working as it should, and the new steam valve is a considerable improvement. I've yet to determine the optimum setting for the oiler's needle valve, so am erring on the generous side for now, giving it one whole turn from fully closed.
No comments:
Post a Comment